

Quilting with a Walking Foot
Quilting with a Walking Foot
Quilting with a Walking Foot
In my sewing past, I had always found using my walking foot difficult — I definitely did not like it, even having been told that it would be one of the most valuable tools in the sewing box if some understanding could come between it and I.
I think the first thing is the name of the foot... Walking. That means slow and steady, not fast and crazy. Slow and steady is a good point to remember when sewing with a walking foot. A walking foot’s claim to fame is that it feeds the top and lower fabrics through your sewing machine together, at the same pace and tension. And I do know that my bottom fabric sometimes gets away from me when sewing without it.

The next thing to remember is that the extra pieces in the box are there for a reason! My walking foot came with a second sole plates, two arms, and something with a screw... I won’t get into the specifics: please read the directions that come with your walking foot and machine. But suffice it to say if you, like me, have only had limited experience trying this tool (or had avoided it altogether), today I am going to recomment that you try it! You might like it! As I found out!
Fast Forward to my recent vacation. The first item I packed was my sewing machine! But before doing so, I pulled out several large tops. Okay, they were large to me ... which means that the prospect of machine quilting them was intimidating to me. And thus, they were ignored until now.
I made quilt sandwiches of the tops, adding batting and backing. And I asked for quilting tips and ideas from my good friend Cyndi Souder of Moonlighting Quilts. (Cyndi is teaching another one of her wonderful machine quilting classes here at the shop on September 12, so take advantage if you can.)
So, armed with information, inspiration, my walking foot and its accessories accompanying my sewing machine, off to the beach I went!
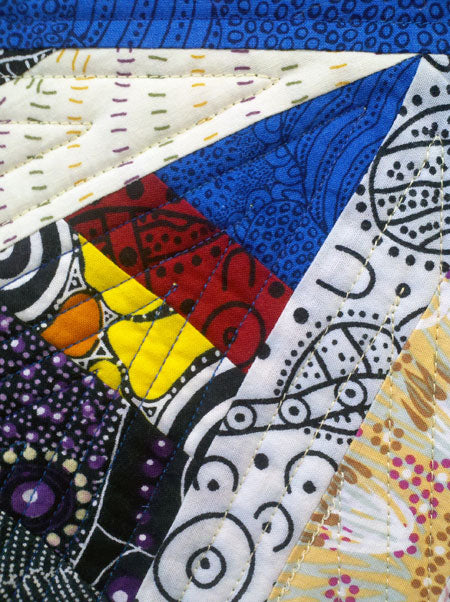
The first project was to quilt a gift for my siste Julier’s friend who had adopted a little girl in Kenya, and yes, they live in Kenya! This was a group project with Julie and her children Celia, Layla and Evan. We collected all the pieces of African fabricI had in my stash, and the kids laid them out and sewed strips. We used an Indigo fabric as the base, and once the strips were done I sewed it all together into a modern quilt. (Click photo for a larger view.)

Now mind you, the original plan was that this was supposed to be a small quilt, like a blankie, but in our enthusiasm it grew to be more than a twin size bed quilt. Definitely OUT of my usual comfort zone for machine quilting! But by using my walking foot, we criss crossed throughout the quilt, and we think it turned out great! Trixie and her daughter Anaya, now 3 years old, were thrilled, as you can see in the photos below here.


She’s just beyond adorable, right?

My Next Vacation Quilting Project
In a previous blog post, I wrote about how I pieced a star quilt using directions from Scraps & Shirttails: Reuse, Re-purpose, Recycle! The Art of “Quilting Green.” by Bonnie K. Hunter. I wanted to encourage my readers to begin looking at traditional quilt patterns to use with non-traditional fabrics, such as the Australian Aborigine designed fabric from M&S Textiles. And now that it has been quilted, it’s finished!

Click for a larger view of the completed quilt »

This machine quilting project was a bit trickier, but my plan was to straight stitch the star and triangle shapes. I even changed the thread colors while machine quilting! I used variegated Star Thread in 848 Blue Pacific for the dark stars and inner border, and 835 Vanilla Cream for the light diamonds (see above and additional closeup below).
To keep the stitching lines straight for this project, I used the edge of the foot as a guide, aligning it with the design shapes and seams. I used black Aurifil thread to machine quilt the border, finishing it off.
Completing this quilt took much longer than I anticipated, but I am very happy with the results!
Now go. Make friends with your feet!

Categories
Popular posts


Leave a comment